
I've had a request from a friend, so I'd thought I'd share how I finished these boxes. My son has one, too. It's brown and has a travel theme. I used stickers on that box ~ so easy. He uses it for his spare change.
Supplies:
Wooden boxes ~ mine are from the dollar store.
Acrylic paint. I used dollar store white and antique white.
Napkins ~ there are many beautiful ones.
1 inch or, depending on the size of the box, a 1/2 inch paint brush.
Foam brushes.
Fine sandpaper.
Embroidery scissors.
Mod Podge
Optional ~ a sponge, preferably a torn textured synthetic sponge.
Optional ~ distress ink. Colour pumice stone.
Optional ~ masking tape. I didn't have any, so I washed the paint off.
Sand the box and dust; place masking tape over the hardware. Apply two coats of acrylic paint, inside and out, ensuring that the first coat is completely dry before applying the second coat; sand lightly between each coat of paint and dust.
Cut around the napkin image you have chosen, or for a less refined look (box to the right) dip a small paint brush in water and lightly dab the wet brush around the image.
Carefully peel the 3 layered napkin back to the 2nd layer, removing just enough of the 2nd layer of the napkin so that you can tack (with mp) the image to the box. Slowly pull off the 2nd layer, adding mp underneath it while smoothing out the wrinkles as you go. (Turn the box for ease of application.) (You can also use saran wrap for a smoother look, but I like a few wrinkles! Google for info.)
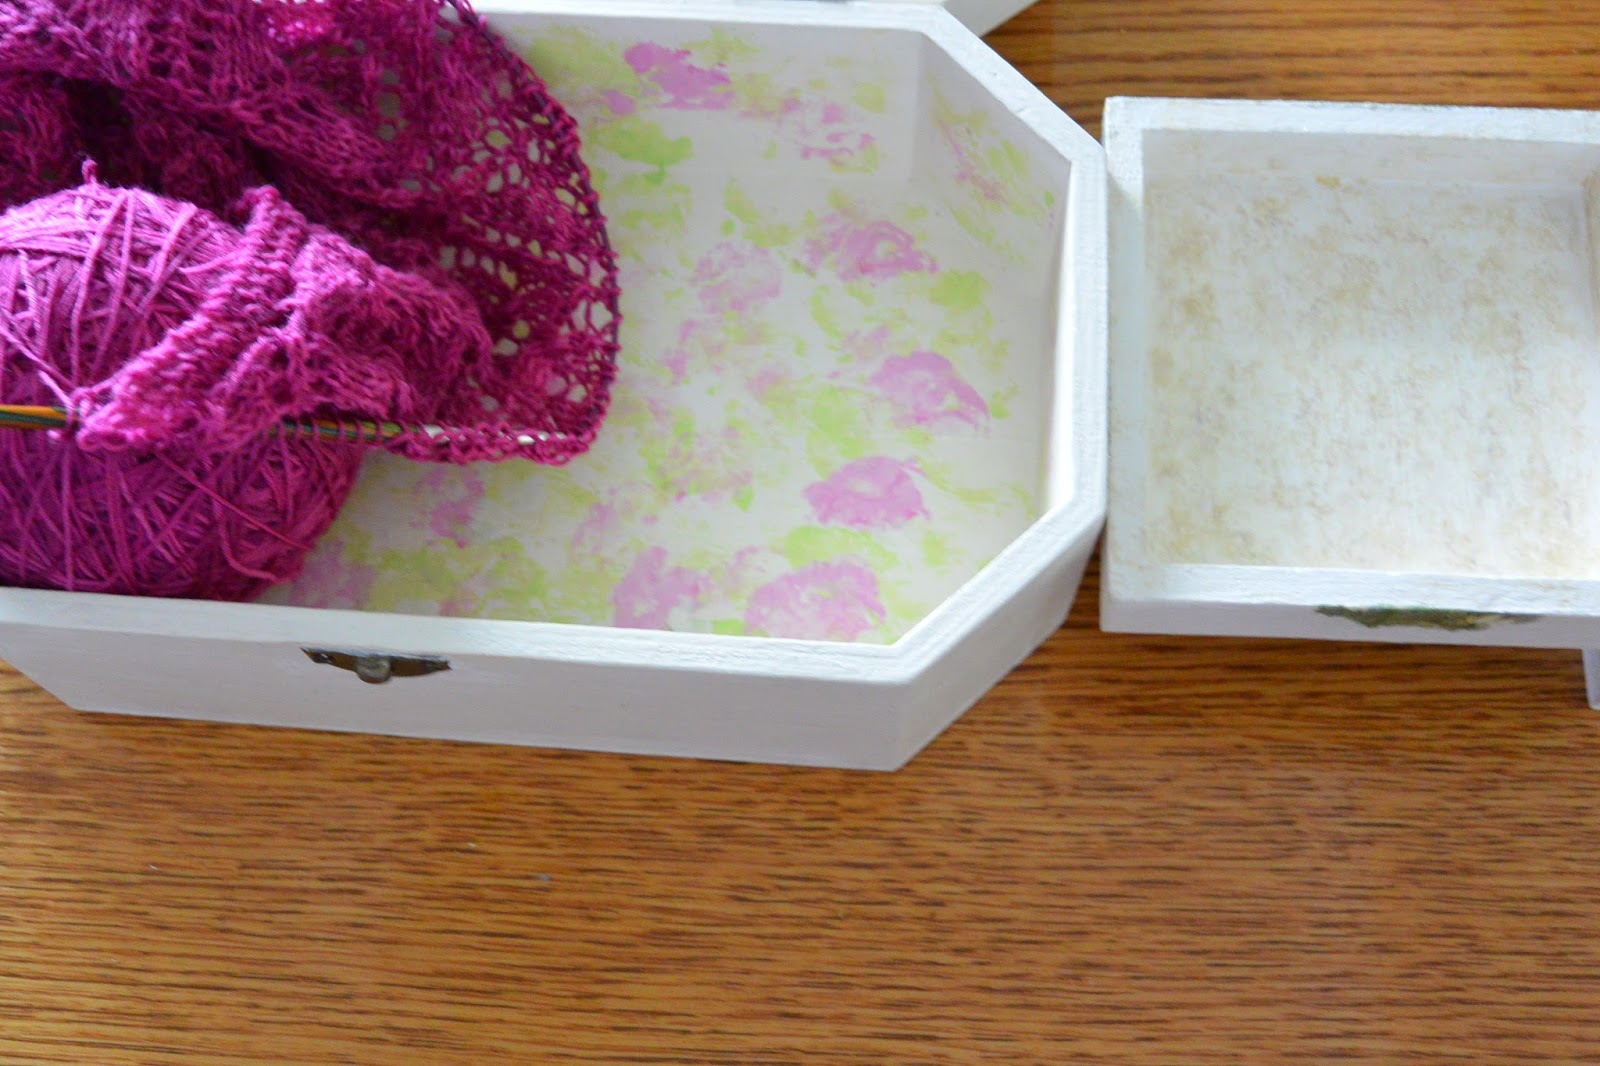
Apply more mp over the top of the napkin with a foam brush, or use mp brush, going on to cover the whole box with an even ( not too thick) coat of mp. Dry the box and lightly sand before adding another coat of mp. If you tear the napkin, you can layer another cut out image over the top to hide it, or build up layers for a 3D look. (See knitting box top left. On the that box, I also smoothed on a touch of ink to give it a fine distressed look before I added the mp.)

To finish the boxes below, I dabbed on acrylic artist paint (a cheap set costs approx. $5.00) with a sponge and applied a coat or two of mp to seal. On the other box, I used distress ink.
Enjoy the week...

8 comments:
How pretty they look. A little gift popped inside would make a present so much nicer.
Very beautiful!
Lovely ... you make it look so simple :)
I would have never thought of using napkins. That is so clever and your boxes are lovely. I may just have to make one with travel theme like your son's. Thank you for the tutorial.
-Soma
Thanks, Joanie.
They are easy to make. Getting the flimsy napkin where you want it is about the hardest part.
Thanks, Fil.
I do hope you make a travel themed one.
You are most welcome, Soma.
They do make a great gift boxes. My sister send me the napkins that I used for the one with the roses.
Thank you!
Post a Comment